This post may contain affiliate links. Please read our disclosure policy.

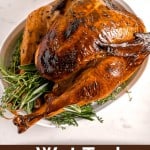

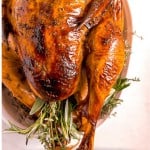
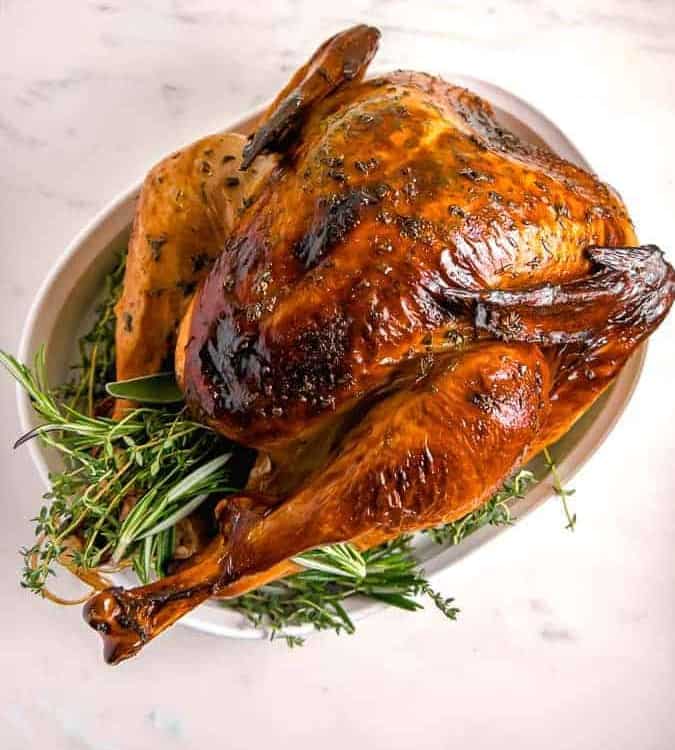
Turkey is the star of your Thanksgiving table. With wet brine turkey, the bird becomes infused with flavor, and you’ll have the juiciest meat with crispy skin. My guests have told me this was the best turkey they had ever had! This easy turkey brine recipe needs to be added to your Thanksgiving menu.

What does it mean to do wet brining?
A wet brine is when you submerge the turkey in a salted liquid overnight. The turkey’s proteins absorb the salt overnight, which in turn helps the turkey retain moisture while roasting.
When you plain roast a turkey, most of its juices will release while cooking, but by wet brining, it retains that additional moisture leaving you with a juicy bird infused with the flavors you brine them with.
You can also check out my dry brine recipe!
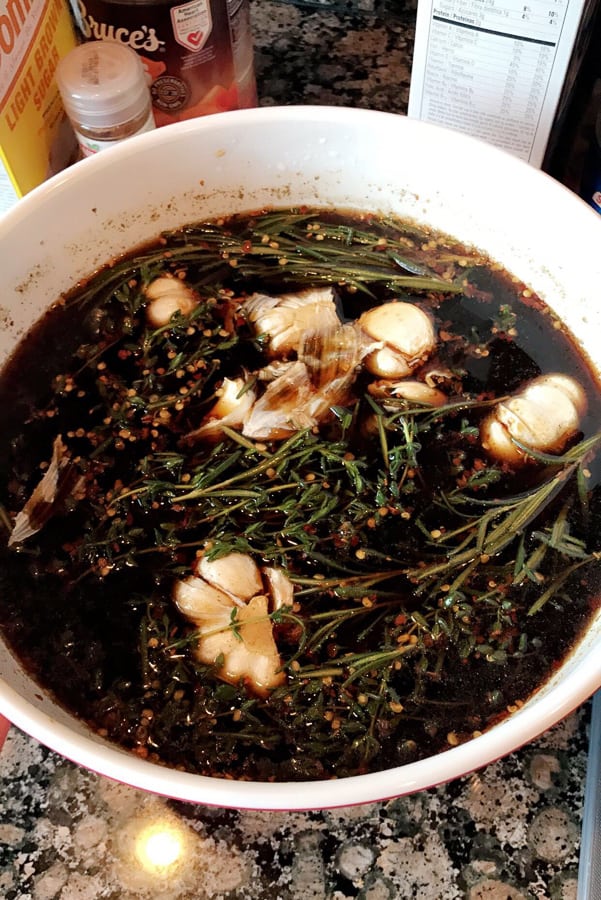
Turkey wet brine ingredients
Email this Recipe!
Email this recipe to yourself to save for later.
By submitting this form, you agree to receive emails from Girl with the Iron Cast.
In its simplest form, wet brining is water and salt. With wet brine turkey, you can really infuse great flavors with added ingredients in the brine.
- Salt: Enhances all the other flavors.
- Molasses and honey: Gives the skin a nice golden brown and crispy texture once roasted.
- Soy sauce: Helps with the brining process but also injects flavor into the bird while being absorbed.
- Red pepper flakes: Adds natural heat to the bird.
- Herbs and aromatics: Sage, thyme, and garlic all give the brine iconic flavors.
Herb butter ingredients
You’ll also need some herb butter to smear under the skin to infuse more flavors and fats into the meat.
- Butter: Unsalted butter helps you control how much sodium you use.
- Lemons: Use fresh lemons so you can zest them and extract as much flavor as possible.
- Fresh herbs: Sage and thyme will give you the classic turkey flavors you love.
Brining equipment
To brine the turkey, you can use: a large stock pot (like one you cook lobsters in) and a brining bag, or you can use a cleaned 5-gallon bucket with a brine bag inside.
Brining tip:
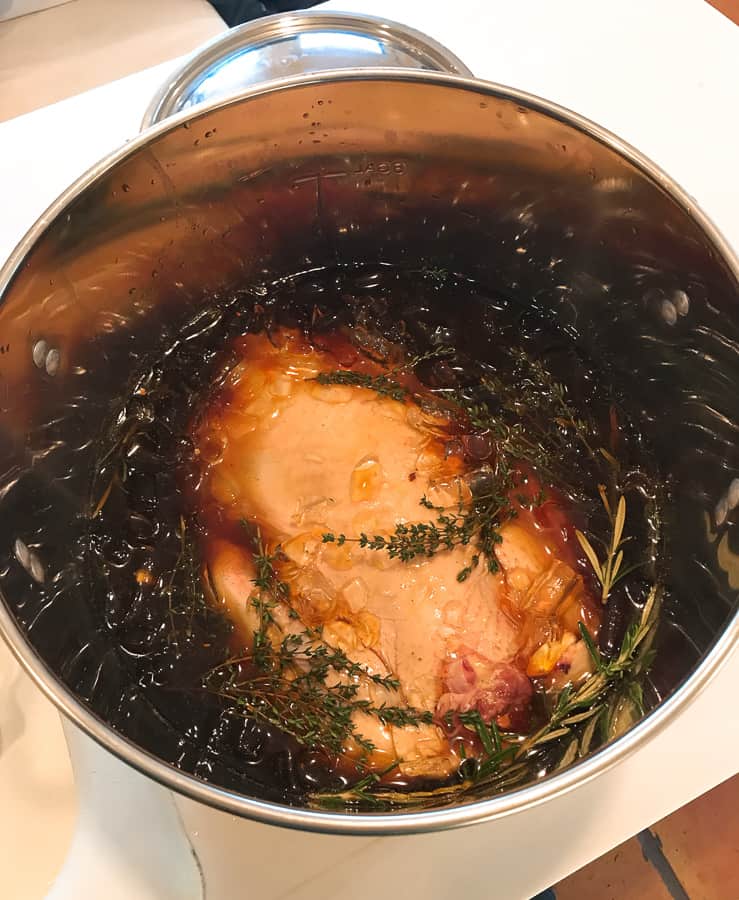
Make sure you submerge the turkey breast side down and that you allow the cavity to fill with water. If you’re using a brining bag, push all the air out prior to closing. Then it’s time for the brine to work its magic!
How to bake a brined turkey
Remove the turkey from the brine. Remember, the body is filled with water, so carefully pour it out before putting it on the rack.
Dry the whole turkey with paper towels, including the inside.
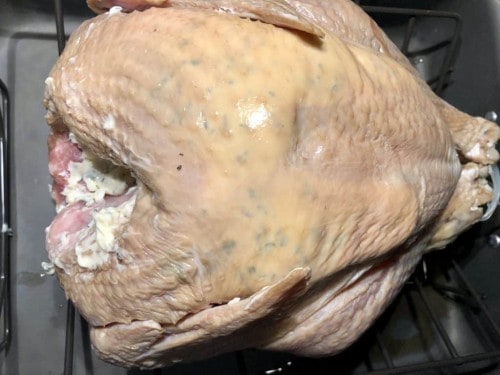
Next comes the good stuff – the herb butter!
Combine the butter, fresh sage, fresh thyme, and lemon zest. Mix it up and start stuffing! This herb butter will flavor the turkey’s skin while roasting.
Add the herb butter under the skin. I also rubbed some on the outside after.
Herb butter tip:
Sometimes it’s hard to get under the skin, so before coming at it with the butter, use your fingers or carefully use a spoon to loosen the skin.
FAQs
Below are some frequently asked questions about baking a wet brine turkey. If you don’t see your question in this list, please leave it in the comments.
How long do you thaw a turkey?
Thaw turkey based on weight. Use the following ranges as a guide:
- 4-12 pounds: 1 to 3 days
- 12-16 pounds: 3 to 4 days
- 16-20 pounds: 4 to 5 days
- 20-24 pounds: 5 to 6 days
According to Alton Brown, you can express thaw and wet brine at the same time in two days.
How long do you brine a turkey?
Brine for 18 hours, max 24 hours. If you brine for too long, the turkey can get overly salty and tough.
If you have reached the brining time and are not ready to roast, remove from brine, pat dry, and place in the refrigerator for up to 24 hours.
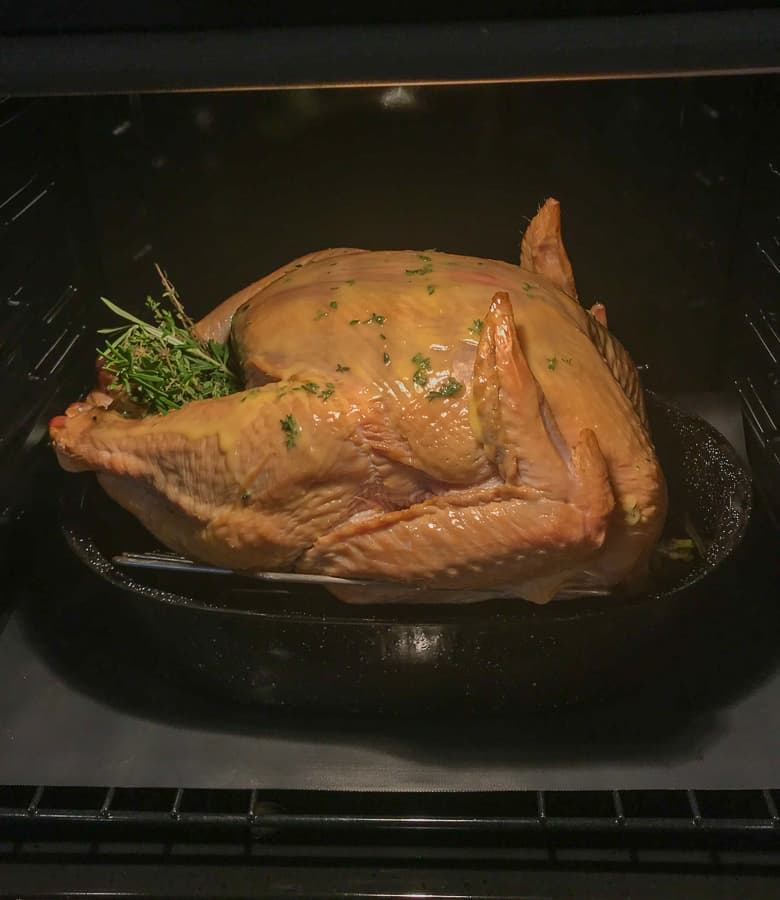
How do you prevent the turkey from burning?
Tent the turkey with aluminum foil (shiny side out) for the first half of the roasting so the skin doesn’t burn. Uncover for the second half to allow the skin to brown and crisp.
How long does it take to bake a turkey?
Since turkeys are different sizes, use a meat thermometer to ensure your turkey is fully cooked. Do not rely on “pop-up” turkey tabs!
Use the following sizes and times as a guide:
- 12-14 pounds at 350 degrees F: about 2 hr 45 min-3 hours
- 15-16 pounds at 350 degrees F: about 3 hr 30 min-3 hr 45 min
- 18-20 pounds at 350 degrees F: about 4 hr-4 hr 25 min
- 21-22 pounds at 350 degrees F: about 4 hr 30 min-4 hr 45 min
What is the safe cooking temperature of a turkey?
Turkey’s temperature should register 165 degrees F before you remove it from the oven. Check with a thermometer in these two places to ensure it is fully cooked:
- Innermost part of the thigh and wing
- Thickest part of the breast
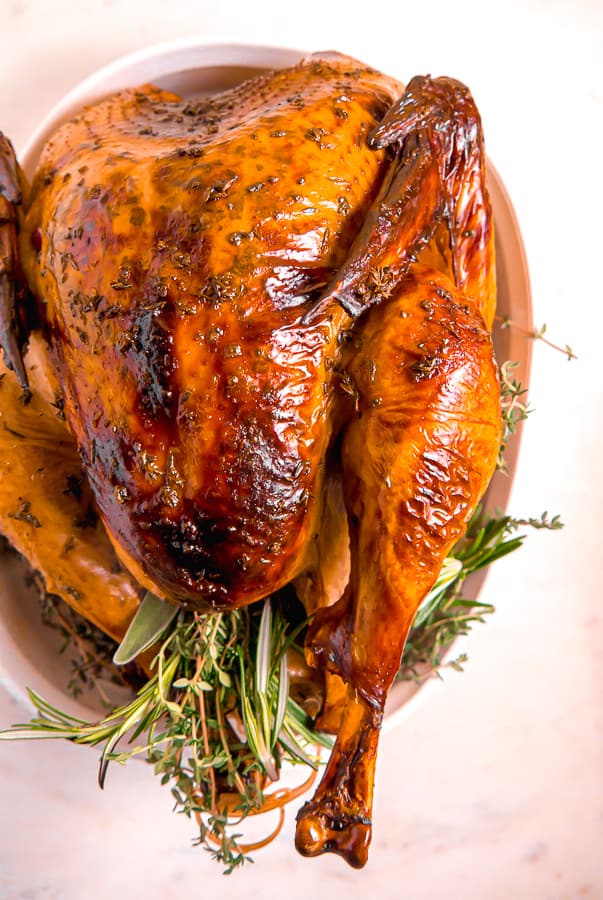
Allow the turkey to rest. Wait at least 20 minutes before carving the turkey to allow the juices to settle.
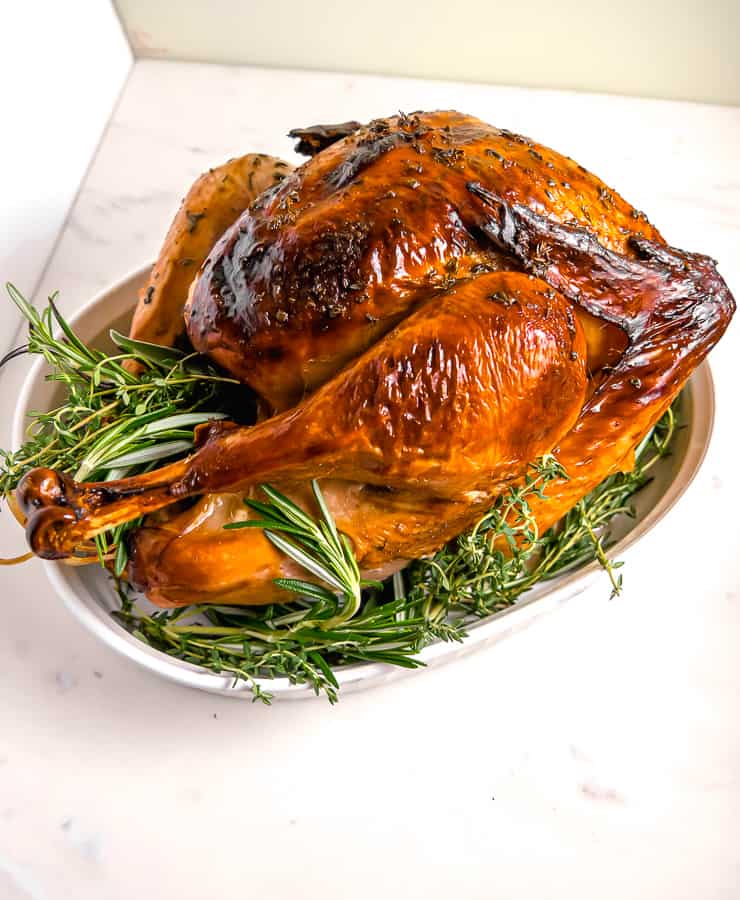
I’ve had family members call this the best turkey they have ever had, and I hope your family loves it too. This easy wet turkey brine is the way to cook your turkey this Thanksgiving!
For the web story version of this recipe, click here!
In need of some Thanksgiving sides?
- Fresh Green Bean Casserole
- Cornbread Sausage Stuffing
- Slow Cooker Butternut Squash Soup
- Shaved Brussels Sprout Salad
- Roasted Butternut Squash Salad
Loved this recipe? Leave me a star review below!
Did you make this? If you snap a photo, please be sure tag me on Instagram at @girlwiththeironcast or hashtag #girlwiththeironcast so I can see your creations!
Easy Wet Brine Turkey
Ingredients
Turkey Brine
- 14 – 18 pound turkey (cleaned, innards removed)
- 6 quarts water (divided)
- 1 1/2 cups coarse kosher salt
- 1 cup molasses
- 2 cups honey
- 1 cup soy sauce
- 1 tablespoon dried red pepper flakes
- 1 tablespoon dried sage
- 10 sprigs fresh thyme
- A few fresh sage leaves
- 2 heads garlic broken into individual cloves (unpeeled & crushed)
- 5 pounds ice cubes
Herb Butter
- 16 tablespoons unsalted butter (softened)
- 2 lemons (zested)
- 1 tablespoon fresh sage (chopped)
- 1 tablespoon fresh thyme leaves
Email this Recipe!
Email this recipe to yourself to save for later.
By submitting this form, you agree to receive emails from Girl with the Iron Cast.
Before You Begin! If you make this, please leave a review and rating letting us know how you liked this recipe! This helps our business thrive & continue providing free recipes.
Instructions
- If frozen, thaw turkey according to weight [see notes]
- In a medium pot, boil 3 quarts of water and mix in the salt until salt is completely absorbed. Remove from heat and let cool for 5 minutes.
- In the same pot, add the molasses, soy sauce, honey, red pepper flakes, sage, thyme, garlic, and mix until blended.
- In your brining pot or large bucket/cooler, add the ice, the remaining 3 quarts of water, and then carefully pour the brine mixture in and mix until fully combined.
- Place the turkey into the pot breast side down and push the bird down to allow the cavity to fill with the brine mixture. Cover the cooler and let the bird sit overnight 18 hours, max 24 hours [see note].
- Once done brining, carefully remove the bird from the brine. Remember the cavity is filled with liquid, so allow it to pour out into the pot. Dry it fully inside/out with paper towels. Place bird on roasting rack+ pan.
- Preheat the oven to 350 degrees F.
- Assemble the herb butter in a small bowl. Using your fingers, by the neck loosen the skin on the turkey so you can get under it and insert the herb butter. You can also use the extra herb butter to rub on the outside as well.
- Put on the lower rack and loosely tent with foil for the first half of cooking, then remove for final half for the skin to brown and crisp. Roast until the internal temperature of the turkey on the innermost part of the thigh and the thickest part of the breast is 165 degrees F [see notes].
- Remove turkey and transfer to a cutting board or serving dish and allow to rest for 20 minutes before carving/serving.
Notes
- Thaw turkey based on weight
- Brine for 18 hours, max 24 hours. If you brine for too long the turkey can get overly salty and tough. If you have reached the brining time and not ready to roast, remove from brine, pat dry, and place in refrigerator for up to 24 hours.
- Tent the turkey with aluminum foil (shiny side out) for the first half of the roasting so the skin doesn’t burn. Uncover for the second half to allow the skin to brown and crisp.
- Time: Since turkey’s are different sizes, use a meat thermometer to ensure your turkey is fully cooked. Do not rely on “pop up” turkey tabs.
- Turkey temperature should register 165 degrees F before you remove it from the oven. Check with a thermometer in two places to ensure it is fully cooked
- Allow the turkey to rest. Wait at least 20 minutes before carving the turkey to allow the juices to settle.
- Nutrition facts based on 1/3 pound turkey with herb butter per serving.
Hi! 🙂 Can I use a brine bag instead of stock pot? I don’t have room to store this pot after I’m done with it, thank you!
Hi Rebecca, yes you can use a brine bag! I hope you enjoy the recipe!
This is the absolute best turkey recipe I have ever made. I have made this 2 years in a row, going into the 3rd year making. Everybody in my family loves this turkey and says the same: best turkey ever!
Wow Sergio, such an amazing compliment! I am so glad that you and your family love the turkey and so happy to hear you’re making it again! Happy Thanksgiving, cheers!
Hi… Thinking about trying this recipe out for a change of pace. I have used a roaster to make my turkey for many years and it always turns out good (breast side down too). Would I need to put water or some kind of liquid in the bottom of the roaster to cook the turkey?
Hi Susan, due to this recipe being a wet brine, the turkey has a lot of moisture in it and I don’t normally add liquid to the bottom in a roasting pan. I’ve never made this recipe in a roaster, I would say if you normally add liquid in the past, two cups or so wouldn’t hurt.
I’m actually making this tonight and starting the brining process in the morning for the solid 20-24 hr brining. So I just basically added all the water now. Will this work? First time making a Turkey for the fam and I second guessing my every move. Lol. Hope you get this in time! Otherwise happy Thanksgiving!
Hi Benjamin! I’ve made this recipe many times for Thanksgiving as well as hundreds of readers! Haha Don’t worry, it will turn out if you’re following the directions. Happy thanksgiving!
Hello!
I am so excited to start my brine here shortly… we are having our Thanksgiving Friday. I have one question that has set a debate in my living room this morning… do you put liquid at the bottom of the roasting pan or not? I don’t see much above about doing that. However, I also see a debate where some people think it could steam burn the bird and others think you have to do it. What is your advice?
Hi Lindsey! I’m so excited for you to make the turkey, I hope you love it. For the wet brine, I do not put any liquid on the bottom of the pan. Since the bird was in a wet brine, you don’t need any steam or juices to keep moist while cooking. Some put liquid on the bottom for gravy purposes, but the wet brine will produce too much salt, so it is not needed.
Nice article. I got the information I needed (how to brown the skin of a brined turkey).
It’s a good tip to mention that the choice of turkeys should not include one that has butter injected under the skin (Butterball, for example). I did that one year and it was so salty, we just ate the side dishes 🙁
I’ve been baking my turkeys (over 30 years) upside down, meaning the breast is down, back, up. Because the juices drip downward, the breast holds the juices last. It really works; I just haven’t had a gorgeous turkey hump to put on the table…for decades; (we’re okay with that). I’m curious about your thoughts on ‘flipping the bird’? (LOL)
JJ, I’ve heard of a lot of people cooking breast side down. It sounds like a great idea and maybe I’ll try next year! For me, I always choose taste over looks, so if it’s not as pretty but tastes amazing, that’s perfect in my book! I hope you have a wonderful thanksgiving.
What brand Turkey do you recommend? I feel like I’m only seeing butterball!
Hi Kelly, there’s a shortage of turkeys this year so I totally understand not being able to find other brands. I’ve used butterball before and still had a great tasting bird! The past few years I’ve ordered an organic turkey through Whole Foods.
Basically, after I made this turkey for my husband’s family last year. I’ve been signed up by my own mother-in-love to make the turkey every year from now on. I don’t mind, it was pretty darn good!!! I’ve never had turkey that wasn’t dry, this was the juiciest turkey I’ve ever had.
I was advised to turn the pan every hour so the turkey would cook evenly and it definitely helped.
I’m so happy you and your family enjoyed the turkey Rebecca! The same thing happened to me, after my family had this recipe I’m now always on turkey duty too ?
Can you make turkey gravy from this recipe??
Hi Jeanette, I typically do not make my gravy from this recipe because due to the salty brine it can come out too salty. Perhaps if you pour some low sodium turkey broth at the bottom of the pan to dilute it and just use some of that to boost the flavor of your gravy it could work? I have not tried this before though
So glad I stumbled upon this recipe!! I was nervous because I’ve never made the turkey before. Let me tell yall this turkey was so tender, juicy, the skin was crispy, all that. I am now crowned honorary turkey maker in family. Thank you for sharing!!
Hi Shannon, I am so glad the turkey turned out so well and everyone enjoyed it! Thank you for making it.